
Short answer
A pre-shift check is not a strip-down. It is a short walk-round, done by eye and by hand, before the machine starts work. The aim is not to find a failure but to catch the early sign of one: has grease reached the bushing, how much tool is left, is there any mark of a loosening tie rod, is a hose weeping or chafing, are the bracket pins secure. The value of this round is in its order. The sequence below is arranged so that a fault found at one step makes the next step unnecessary: judging the tool before checking grease, or reading the sound before looking at the tool, will mislead you.
Why before the shift, and why always the same order?
Most attachment failures do not happen suddenly. They signal for several shifts and grow because nobody looks. A bushing that is not getting grease first runs hot, then changes its sound, and finally seizes the tool. The first link in that chain is plain enough to see in a two minute look on a cold morning.
There is a practical reason for doing this before the shift: the machine is cold and still. On a hot breaker a weep evaporates, grease melts and spreads, and a hairline crack hides under a film of oil. On a cold machine the same weep stays as a drop and shows.
Keeping the order fixed is what prevents omissions. On site the check is rarely skipped outright; it is left half done because the sequence broke. The operator looks at a hose, the phone rings, and on returning he believes he already checked the tie rods. A round that always runs the same way, from the machine outwards to the tool, removes that risk.
The round, step by step
- 1
Check the bracket and pins
Are the mounting pins, retainers and, on a quick coupler, the safety lock all in place? Cracked paint or a bright rubbing mark between bracket and housing means the joint is moving.
- 2
Follow the hoses and fittings
Look for damp fittings, opened braid, and dried oil that has collected dust on the paintwork. Where a hose rubs the machine or the corner of the boom it polishes before it bursts. If you cannot tell where a leak starts, the order in the oil leak guide will help.
- 3
Scan the housing and tie rods
Cracked paint around a nut, or a fine reddish dust (fretting dust), means a tie rod has begun to loosen. Those two marks are the early signs of loosening and call for a torque check.
- 4
Look at the tool and the retainer
Has the working end begun to mushroom, and is there a one-sided polished mark on the shank? Is the retaining pin fully seated with its lock in place? A one-sided mark on the shank tells you the bushing is not wearing evenly.
- 5
Verify the grease points
With manual greasing, grease goes in with the tool pressed up, and clean grease should appear around the wear bushing. With an automatic system the questions are whether the cartridge still has grease in it and whether the pump is running.
- 6
Check the hydraulic circuit and oil level
The machine oil level and the filter warning are the attachment’s health too. Dirty oil reaches the attachment as well, and the damage chain starts there.
- 7
Run it off load and listen
Run the attachment briefly without setting it into material. Is the rhythm even, is there a metallic rattle or a dull blow? We covered what the sound is telling you in the sound guide.
Grease: one check, two separate questions
The grease step is the one most often half done, because it collapses two questions into one. The first is whether grease went in. The second is whether it reached the right place. Grease coming out of the nipple answers the first and says nothing about the second.
The only visible proof that it reached the right place is clean grease emerging around the wear bushing. If none appears, either the passage is blocked or the grease was given with the tool in the wrong position and never reached the gap between bushing and shank.
With a cartridge fed automatic lubrication station the question is simpler but easier to skip: is there grease left in the cartridge? A cartridge that looks full stays full if its pump is not running. Checking the cartridge before the shift costs less than a breaker running dry at midday.
What changes with the attachment
The sequence above is built around a breaker, because that is what is most often on site. On other attachments most steps stay the same and a few change place.
- On shears and pulverisers, blade and jaw inspection takes the place of the tool check. Look for crushing on the blade edge and play in the jaw opening.
- On grapples, check tine tips, joint play and the sealing of the rotation motor. Tines of unequal length load the grip on one side.
- On a drum cutter, check the pick holders and look for missing picks. One missing pick makes the drum run out of balance and the neighbouring picks go quickly.
- On a ripper, check the tooth wear limit and look for weld cracks; side load cracks appear most often where the body meets the bracket.
- On a hydraulic auger, check the bit, the flighting edge and the gearbox for oil seepage.
Do and don’t
Do
- Run the round in the same direction and the same order every time; a changed order means a skipped step.
- Look while the machine is cold. Weeps and grease traces show cold and disappear hot.
- Confirm by eye that grease emerges around the bushing; grease at the nipple is not enough.
- Write down what you find, however small. The same small fault logged two shifts running is no longer small.
- When in doubt, run it off load and listen. Sound usually reports before the eye does.
Don't
- Do not inspect an attachment hanging in the air. Set it down and never go under the boom.
- Do not skip it because you looked yesterday; a tie rod can loosen within one shift.
- Do not wipe a leak and move on. A wiped leak has not gone, you have only lost its source.
- Do not accept a missing pick or a loose retainer as good enough for today; retainer damage carries into the housing.
- Do not merge the round with greasing to save time. Greasing is done with the tool pressed up and is a separate job.
If you want the interval, the manual is the source
We deliberately do not print an hour figure here. Greasing intervals, torque values and wear limits change with the model and the site; an invented number does more harm than a sound method. Check the manual for your own model, or send us the model code.
Putting the check on record
The real value of the round appears over time, not on any single morning. "Third time this week the same fitting is damp" says far more than one look. For that, the record has to live somewhere.
The simplest form is a sheet kept with the machine: date, shift, who looked, what was found. Paper works, but it has two weaknesses. Nobody notices when it stops being filled in, and when the attachment moves to another machine its history stays behind.
If an attachment travels between machines or across sites, the record has to belong to the attachment. Counting running hours on the attachment itself also takes the maintenance interval out of guesswork.
What HKM uses
SolidTrack: the record stays on the attachment
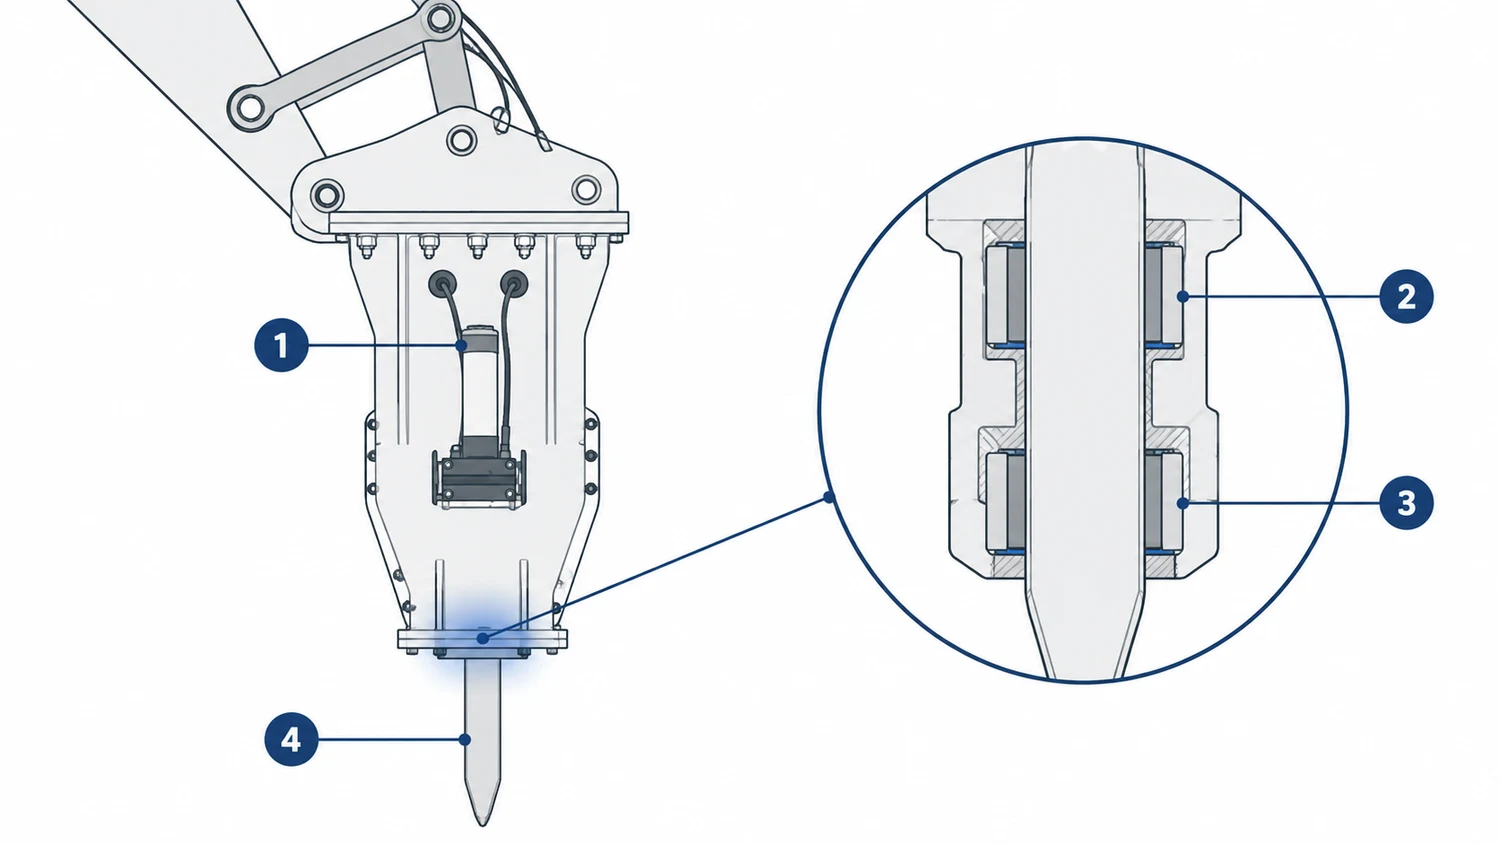
The telemetry unit we fit to HKM breakers mounts on the breaker, runs on its own power source and counts working hours independently of the carrier. When the attachment changes machine its history travels with it, and service reminders are built on those hours.
See the SolidTrack breaker solution(solidtrack.io)